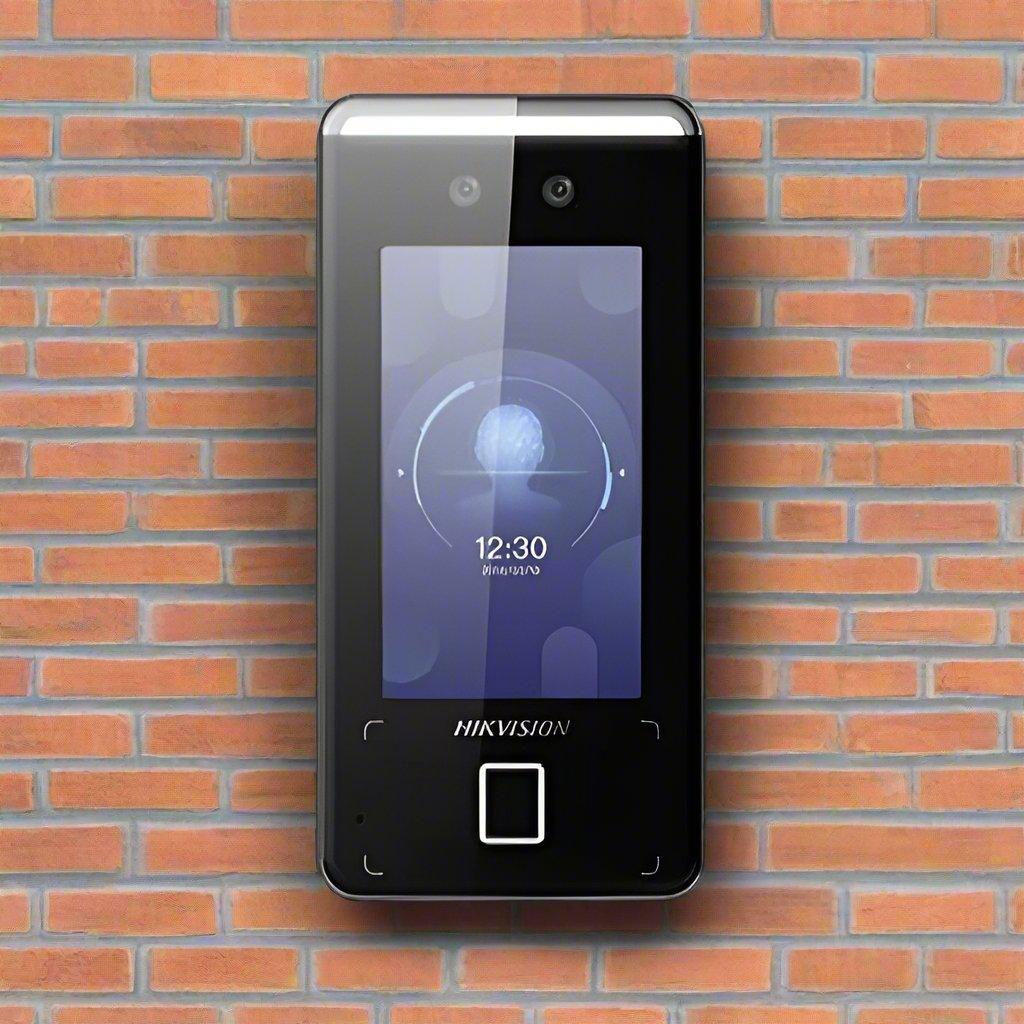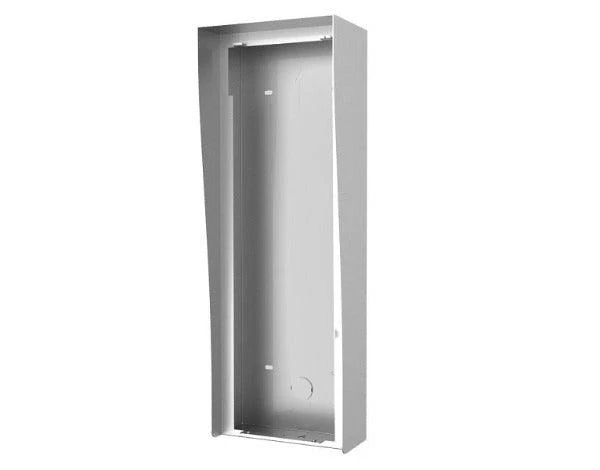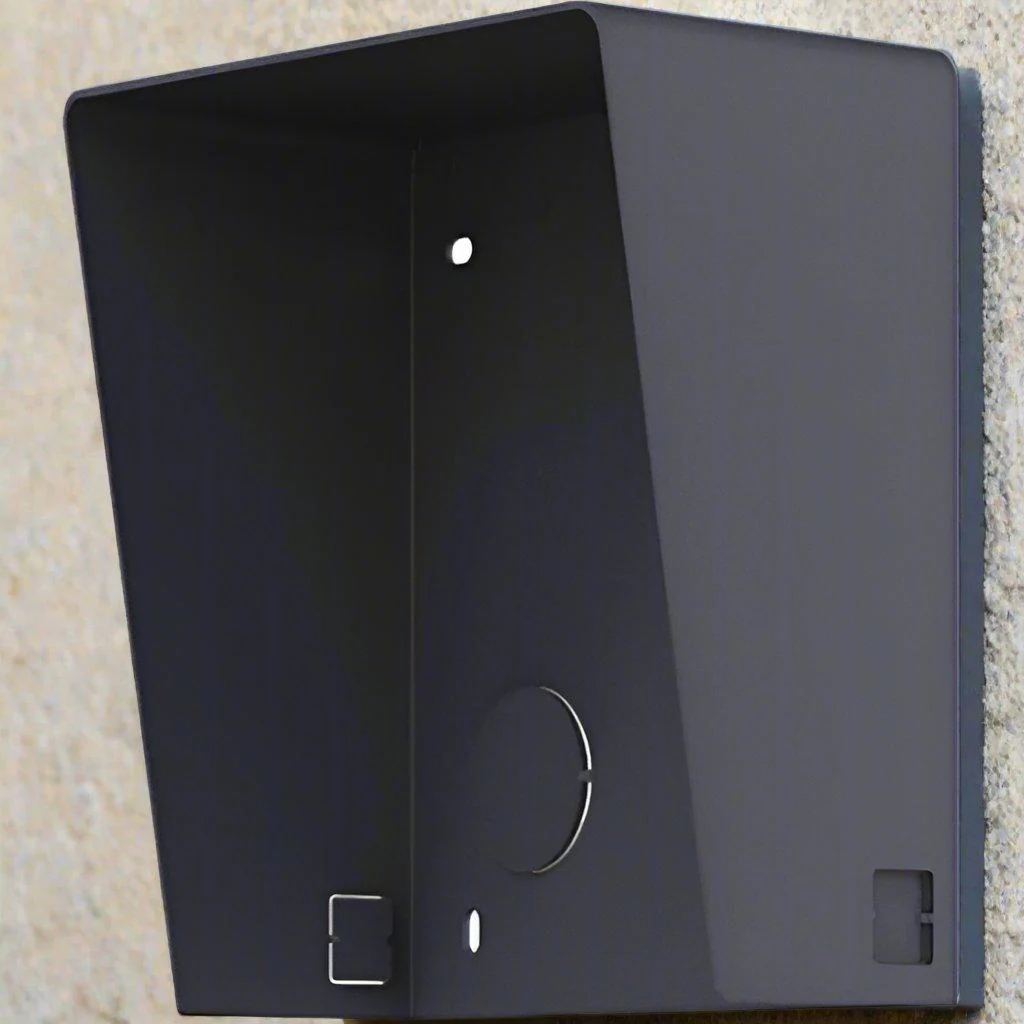

Hikvision DS-KABD8003-RS1 2nd Gen Door Shroud to suit DS-KD-ACW1
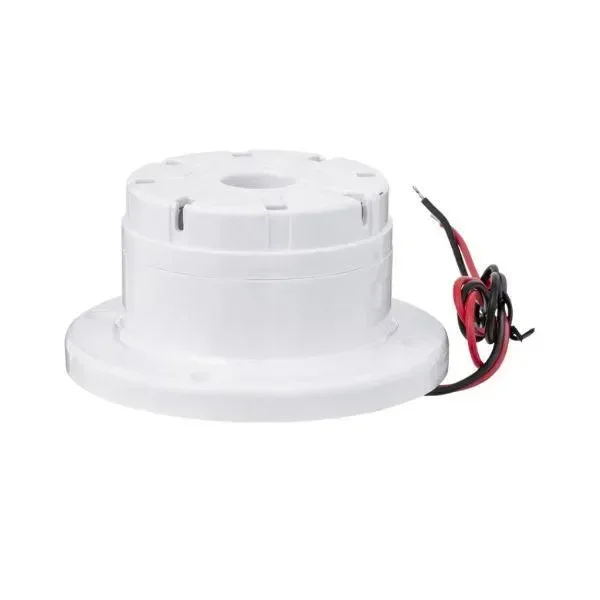
Hikvision's Module Door Station Rain Shield, DS-KABD8003-RS1
Model: DS-KABD8003-RS1
Specifications
- Working Temperature: -40° C to +60° C (-40° F to 140° F)
- Working Humidity: 10% to 95%
- Weight: 298.9g
- Dimension (W × H × D): 122x 116.4×58 mm (4.80" x 4.58" x 2.28")
- Material: SECC
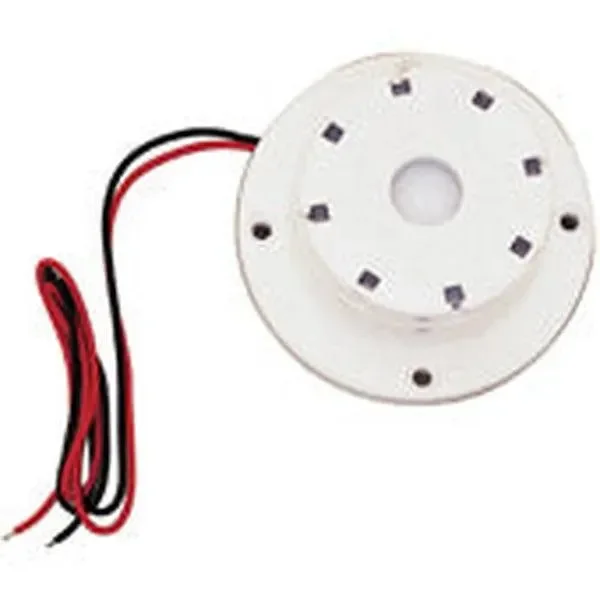
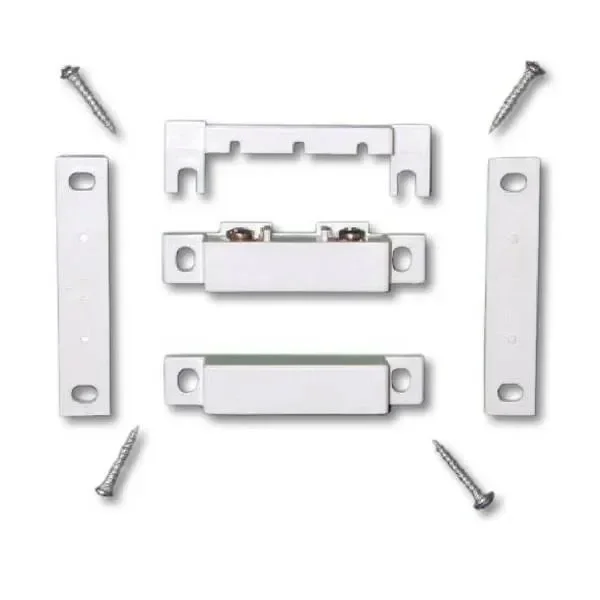
Installation
1. Paste the installation Sticker 1 onto the wall. Make sure the sticker is placed leveled via measuring with the gradient. Drill 4 holes align to the screw holes on the sticker.
The suggested size of the hole is 6 (diameter) × 25 (depth) mm.
2. Remove the sticker and insert the expansion sleeves into the screw holes. Fix the mounting frame and protective shield onto the wall with 4 expansion bolts.
3. Connect the cables to the corresponding interfaces of the main unit and insert them into the frame.
4. Use the hexagon wrench in the package to fix the cover onto the frame.
Learn More
Check out our blog post
- The Benefits of A Home Intercom System
- The Best Intercom Kits
- Smartphone intercoms improves security to you home
- Choosing an intercom system for home
- Choosing An Electric Door Strike
Shop CTC Communications for best deals on Hikvision Intercom kits.
Product Information
Product Information
Shipping & Returns
Shipping & Returns
Description
Hikvision's Module Door Station Rain Shield, DS-KABD8003-RS1
Model: DS-KABD8003-RS1
Specifications
- Working Temperature: -40° C to +60° C (-40° F to 140° F)
- Working Humidity: 10% to 95%
- Weight: 298.9g
- Dimension (W × H × D): 122x 116.4×58 mm (4.80" x 4.58" x 2.28")
- Material: SECC
Installation
1. Paste the installation Sticker 1 onto the wall. Make sure the sticker is placed leveled via measuring with the gradient. Drill 4 holes align to the screw holes on the sticker.
The suggested size of the hole is 6 (diameter) × 25 (depth) mm.
2. Remove the sticker and insert the expansion sleeves into the screw holes. Fix the mounting frame and protective shield onto the wall with 4 expansion bolts.
3. Connect the cables to the corresponding interfaces of the main unit and insert them into the frame.
4. Use the hexagon wrench in the package to fix the cover onto the frame.
Learn More
Check out our blog post
- The Benefits of A Home Intercom System
- The Best Intercom Kits
- Smartphone intercoms improves security to you home
- Choosing an intercom system for home
- Choosing An Electric Door Strike
Shop CTC Communications for best deals on Hikvision Intercom kits.